
Ron Graham
Puppets and other papier mache creations.
Fine art with paper as medium or support.
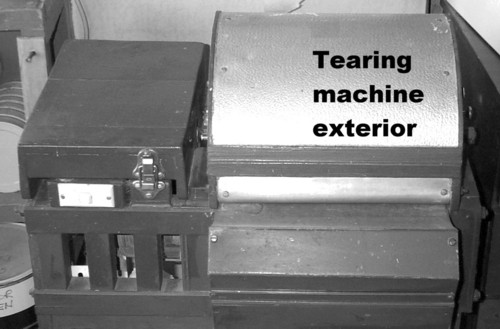
Whilst paper can be cut or preferably torn into small pieces by hand, and this is sufficient for small quantities of pulp, it may be your wish to make a paper tearing machine similar to the one illustrated on this page.
Paper sheets up to A4 size can be inserted into the slot at the front of this machine whilst gripping the paper so that the machine does not gobble it up too fast. The paper will be pulled in against your resistance, and torn into small pieces averaging 50mm wide. The tearing is irregular, and it curls and separates each torn piece, making soaking and beating easier.
Children should not be allowed near the machine at any time. The machine should not be switched on or even be plugged into a power point, unless the lid is clipped tightly closed. The slot must be so narrow as to allow only a few sheets of paper to enter, whilst preventing fingers from getting anywhere near the rotating bars. The hood and cabinet should be thick and strong.
The collection box must be closed when the machine is running. It must be deep enough so that torn paper can be removed without the hand going near the rotating bars. Nevertheless you never have the box doors open, and never put your hand in the box, while the machine is rotating. Use hand, eye, ear, dust, and electric shock protection as appropriate.
Regularly remove paper that fouls around the shaft, and remove dust from the motor compartment. I have no control over the standard of workmanship and safety precautions in your workshop, so I cannot take responsibility for your safety. If you will not observe safe practice, then you do not have my permission to make and use the machine and methods described on this page.
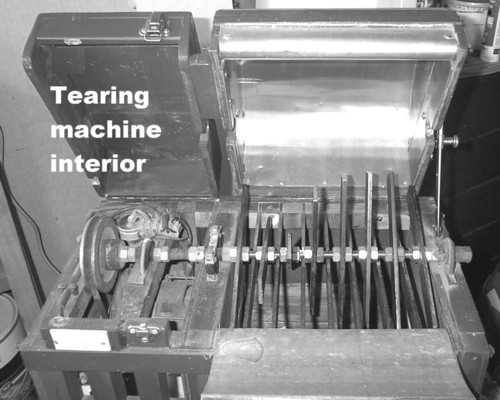
The machine works on very simple principles. A shaft consisting of 13mm (or half inch) threaded rod has a pulley at one end for connection by belt to the electric motor. The shaft is mounted with three bearings, one behind the pulley, and two on either end of the rotating bar assembly. The two extreme bearings are fixed, the other one between them has rubber mounts that can flex with vibration.
The rotating bar assembly consists of eight bars attached to the shaft with two nuts locking each bar tightly. The bars are attached in a spiral array so that the assembly acts as a flywheel to keep the rotation strong and even under variable load. The steel bars are left blunt. They are 240mm long, 35mm wide, and 6mm thick, and spread evenly across 300mm of the shaft.
Note that the rotating bar assembly is hooded separately to the motor compartment. This prevents paper dust and pieces from getting all over the motor assembly causing malfunction and possibly a fire.
The interior lining of the hood covering the rotating bar assemply should be curved to follow the arc of rotation, with only about 10mm clearance between the hood lining and the rotating bar tips. This forms a tight tearing chamber preventing pieces of paper from constantly flying around until they are pulverised into dust.
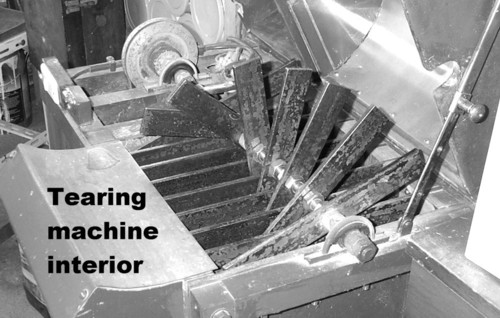
An assembly of fixed bars is mounted level just below the shaft so that the rotating bars pass between them. The fixed bars not only provide solid structural support, but also act as a foil for the paper sheets that slide over them. The rotating bars then smash through the paper and knock it down through the fixed bars to a collection box underneath. The bars are mounted on threaded rods that run the full width of the machine. Drilled wooden spacers separate the fixed bars.

A small box is mounted below the fixed bars, deep enough to keep the collected tearings away from the rotating bars, so that they do not keep lifting the tearings back up. The box has doors making it like a small cupboard. When you open the doors to remove the collected tearings, the open doors act as a barrier to prevent tearings from falling everywhere and to guide the tearings into your bucket.

I designed and made this machine two decades ago. It is the only machine of any size and complexity that I have ever made. I made it in a carport, not having a workshop. I had only a worn hand held electric drill and very basic tools. I was short of money at the time so I could not afford better equipment or to get the bars drilled at an engineering workshop.
I hope that you do not have to make your paper tearing machine the hard way like I had to. Remarkably, the machine has never needed any repair, and has passed into a new millennium still going strong. So I also hope that you have as good luck with your machine as I have had with mine.
You probably wonder why I didn't just buy a paper shredder. Well if they had them in those days they were too expensive. However, it proves not to be such a good idea because the shredder cuts the paper fibres too short and longer fibres are stronger. Also the shredder does not make pieces of paper, but strings.
This prevents you from using a rotary beater effectively since the strings all tangle around the beater shaft like spaghetti round a fork. I tried it once when someone gave me a large bag of shredded paper. Suddenly there was this swiftly rotating mass of wet paper spaghetti, rapidly getting bigger and wobblier. It was hilarious, but the rest of the shredded paper went into the compost heap.
Shredded paper may pulp well in a food processor if soaked in warm-to-hot water. This is good for small quantities of pulp.
Copyright © Ron Graham 2004,
ABN 20 031 339 748
www.rongraham.com |